Software Engineer. Sensible in DevOps/SRE. Ability to dig deep across multiple layers of the stack, from networking and virtualization to configuration management, packaging and deployment. Comfortable with creating, testing, deploying, operating and debugging software at scale.
Skilled in Python, Shell Scripting, CI/CD, Terraform, AWS, Ansible, Docker, Kubernetes, Jenkins, Vagrant. Good Experience with databases like PostgreSQL, Greenplum, MSSQL and IBM Db2.
Ansible is a simple IT automation system. It handles configuration management, application deployment, cloud provisioning, ad-hoc task execution, network automation, and multi-node orchestration.
Commercial versions are available. But most of it is free and open source. To use Ansible, we need to install it on our control machine. Installation on target machines is not required (agentless).
I have installed Ansible on my archlinux machine.
Install Ansible on archlinux
You check the Ansible version as below:
Version
Now you can see the config file path = /etc/ansible/ansible.cfg
As Ansible uses SSH to connect to the targets. Make sure you can establish SSH connection to the target machines from the control machine.
I will use a AWS EC2 instance as my target here. I already have this setup and have the ssh key copied there.
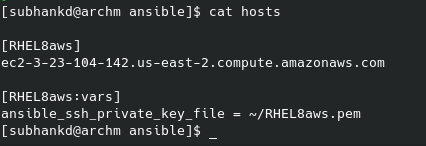
Now we setup the hosts file for ansible:
hosts file
It contains the list of hosts that you want to connect and how to connect to those.
RHEL8aws.pem is the ssh key file generated during the AWS EC2 instance setup.
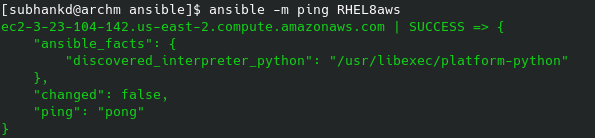
Now we are ready to use Ansible. Most simple way to check if are setup properly is to ping the host.
ansible -m ping RHEL8aws    # only hosts with RHEL8aws tag
or
ansible -m ping all         # all hosts
ping
Ansible can accomplish more complex tasks via playbooks. But i will cover only ad hoc commands here.
Ansible has various modules to execute commands on the target host. Another such module is the shell module, used to execute shell commands. We have already seen the ping module.
shell
By default Ansible will use the same user as the control machine. You can change this with the -u option.
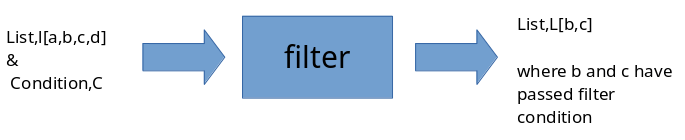
filter function is used to filter out results from a list. filter function will run our filter condition on each element of the list. If the filter condition is satisfied the element is passed to the output list.
Filtering using list comprehension:
# filtering squares greater than 50
filter_squares = [n for n in squares if n>50]
print(filter_squares)
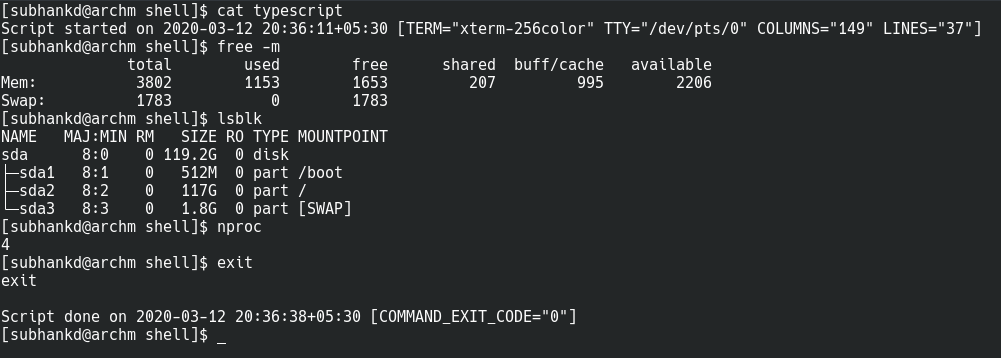
script command is used to record shell sessions. It is useful for documentation, capturing and replicating issues.
Simplest Implementation:
Simple script command example
Now by default, output file is ‘typescript’. We can pass any other name for output file as below. $ script myscript.log Now myscript.log would contain the output. If we examine the contents of this file, we find exactly what we expect. Our session is recorded 🙂
Contents of ‘typescript’ output file
Record and Playback:
Another useful feature of this script command is the ability to record and playback the session. We have to enable timing log for this to work.
$ script myscript.log –timing=time.log
time.log would be the timing log which helps in replaying the recorded script.
Recording shell session for replay
To replay the recorded shell session we use the scriptreplay command:
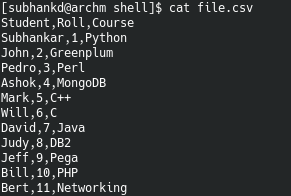
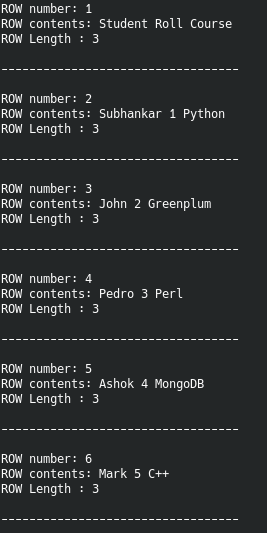
This is a shell script to read a csv file into array and display the contents.
Using an array is preferred we can keep track of no. elements in a row. For example: echo ${row[@]} will display all the elements of array. echo ${#row[@]} will display the no. of elements in the array. Also to get the 2nd element of the array, use : echo ${row[1]} Note: Array index here in bash shell starts from 0.
#!/bin/bash

clear

row_no=1

while IFS=',' read -a row ;             # read into an array named row
do
        echo "ROW number: $row_no"
        echo "ROW contents: ${row[@]}"  # display all the elements of array
        echo "ROW Length : ${#row[@]} " # no. of elements in the array
        echo -e "\n----------------------------------\n"
        ((row_no++))
done < file.csv
Below is the csv file contents and output of the script.
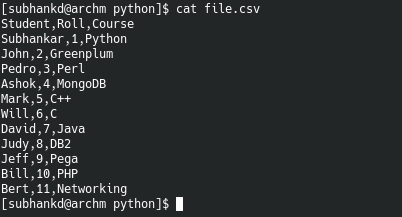
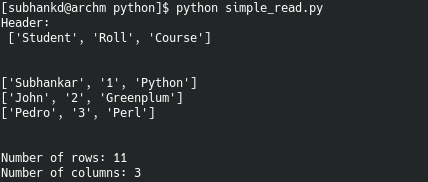
Below is an example code which reads “file.csv”. Assume it contains data from a table with table headers as it’s first row.
We extract the table header with : contents_header = contents[0] We then remove the table header from dataset by slicing: contents = contents[1:]
Function explore_data() prints rows read from file. It can also show total no. of rows and columns in the data.
from csv import reader

opened_file = open('file.csv')
read_file = reader(opened_file)
contents = list(read_file)   #read the contents of file as a list
contents_header = contents[0] #extract only the header
contents = contents[1:]      #remove the header

def explore_data(dataset, start, end, rows_and_columns=False):
    dataset_slice = dataset[start:end]
    for row in dataset_slice:
        print(row)
        print('\n') # adds a new (empty) line between rows

    if rows_and_columns:
        print('Number of rows:', len(dataset))
        print('Number of columns:', len(dataset[0]))

print('Header : \n', contents_header)
print('\n')
explore_data(contents, 0, 3, True)  #print row 0 to 2, Also show no. of rows and columns
A service unit describes how to manage a service or application. This includes how to start or stop the service, under which circumstances it should be automatically started, and the dependency and ordering information for related software.
System Unit files are generally loaded from: /etc/systemd/system/
Below is an example of a simple service unit file:
Using this example you can automate certain tasks on boot. You just need to change the service dependency and the script that you need to execute.
[subhankd@archm system]$ cat /etc/systemd/system/my_sub.service
[Unit]
Description=My Service -- Run before sddm
Before=sddm.service

[Service]
Type=oneshot
RemainAfterExit=yes
ExecStart=/usr/local/bin/my_sub.sh
ExecStop=/usr/local/bin/my_sub2.sh

[Install]
WantedBy=sddm.service
[Unit] Section
The first section found in most unit files is the [Unit] section. This is generally used for defining metadata for the unit and configuring the relationship of the unit to other units.
Description= : Set this to something short, specific, and informative.
Before=sddm.service : Here I have used the sddm service as my trigger. sddm is the display manager that was installed on my machine.
[Service] Section
The [Service] section is used to provide configuration that is only applicable for services.
Type=oneshot: This is useful for scripts that do a single job and then exit.
RemainAfterExit=yes : So that systemd still considers the service as active after the process has exited.
ExecStart=/usr/local/bin/my_sub.sh : Execute the script before starting sddm.
ExecStop=/usr/local/bin/my_sub2.sh : Execute the script before stopping sddm.
[Install] Section
This section is optional and is used to define the behavior or a unit if it is enabled or disabled. Enabling a unit marks it to be automatically started at boot. This is accomplished by latching the created unit in onto another unit that will be started at boot.
WantedBy= : To specify how a unit should be enabled. This directive allows you to specify a dependency relationship
Now once you have the service unit file ready, create the script file as per your requirement. Do make sure the script files are executable by the root user.
Finally enable the service you just created, to start at boot: